6. Tanks
Water
A ten gallon system pulls a lot of water. And seattle water is chlorinated. So I rigged a hose attachment to a inline charcoal filter and ran the copper tube up to the hot liqueur tank with a ball valve.
Hot Liqueur Tank (HLT)
I decided pretty quickly to use my existing keggle as a hot liqueur tank. It already had a valve and only really needed a thermometer and a sight glass or some other way of measuring volume. Because it would only contain water, scorching was no issue on the relative thin bottom. I bought a 16" sight gauge from morebeer.com. I didn't need a thermometer on my boil kettle so I reused the blichman thermometer that came with it on the HLT.
Mash Lauter Tun (MLT)
I spent a lot of time thinking through the mash tun. In the end the choice of mash tun will determine which brewing process is most convenient. Coolers (without electrical elements) lend themselves to single infusion mashes where one temperature is held for a long period of time. A step mash could be theoretically possible by adding boiling water, but would require the right recipe and probably somewhat limited in application. Brew kettles that can be direct fired are better for step mashes where several different temperatures are held for shorter periods of time. Either type of vessel is pretty good for decoction mashes. I didn't consider the applicability of the mash tun for either RIMS or HERMS as I wanted a simpler first system. Jumping at either of those choices involves lots more complexity and a whole new set of decision criteria.
I landed on a cooler, because I anticipated doing a lot of single infusion mashes, which take less time and are easier to replicate the process from one batch to another. Cost was a factor too. A cooler mash tun will run ~$70 once you are done with building a manifold, a valve and pay tax and potentially shipping. A keggle with a false bottom, valve and additional burner is likely $100+, assuming you do the conversion yourself. A pro kettle, with all the bells and whistles will be closer to $300 - $400. Starting with a cooler and upgrading to a direct fire mash tun down the road is reasonable as well.
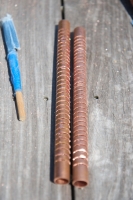
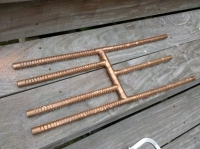
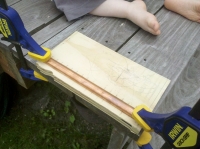
For a grain filter I went with a copper manifold. It was a pain in the you know what! I tried a dermal, a hacksaw and finally settled on a sawzall. All three left a tone of little copper fillings that had to be painstakingly removed. I taped up sand paper to a wooden dowel and used it in a drill to get at the filings inside the pipe. It worked, sort of. Mostly it was a whole afternoon of filing to get the manifold clean. In the end though, this manifold has been an outstanding filter, so the hard work was well worth it. It can drain with the ball valve wide open. Wheat, Rye, Spelt, I've never had a stuck mash. And it comes apart in a snap and cleans easy. I would recommend it to anyone building a cooler mash tun in highly, even though it is a ton of work to build.
A few great reference links:
Boil Kettle
Finally for the boil kettle I wanted a good stainless steel brew kettle with a three ply bottom. Having a sandwiched layer of aluminum provides better heat distribution and helps prevent scorching. I asked for this for Christmas and got a top of the line Blichmann Boilmaker, with a thermometer, that I plan to use on the keggle for the HLT. Woot!
Previous | Contents | Next


